

Disclaimer: Thank you National Hardware for sending us the hardware for our sliding barn door! This post contains affiliate links.
Our sliding barn door in our master bedroom is one of my FAVORITE features in our home. It adds so much character and there’s a story behind it too! We knew we wanted to add a few features that we could call our own when we starting thinking about building our custom home.
My husband found a listing by a local farmer who wanted to sell extra barn boards that he had acquired from a barn that had nearly burnt down on the same road as his own farm. He salvaged as many beams and boards as he could from the wreckage. We bought a pile of boards and a beam from him to use for a single sliding barn door and our fire place mantel. (Click here to see our mantel.)
We love that the wood is from an authentic Wisconsin barn that was just a couple towns over from our new home. It’s beautiful solid oak and cannot be replicated. We didn’t stain, paint, or treat any of the wood. Just cleaned it up and let the natural aging and beauty shine through.

34×82 SINGLE SLIDING BARN DOOR MATERIALS
- Six – 1 in. x 8 in. x 8 ft. solid oak boards
- One – 1 in. x 5 in. x 8 ft. solid oak board
- Screws
- Wood Glue
- Two Clamps
- Drill
- Circular Saw


STEP 1 | If you have a circular saw (and know how to use one), start by cutting the boards down to size. If you’re buying new lumber from a hardware store, you can have them cut the wood for you. The barn boards we used were all different sizes so, Jeremy had to cut them down to the appropriate sizes.
STEP 2 | Line up the 5 vertical boards and clamp them together. Line up the horizontal and diagonal boards, apply wood glue, and flip over onto your door. Drill in two screws on each of the three boards, just to hold it together temporarily.
STEP 3 | Flip it over and drill screws into each of the five boards along both of the horizontal boards and diagonal board. Leave the clamps on overnight.
STEP 4 | The next day, remove the clamps and the six screws from the front of your door. There will be holes, but it just added more character for our wood and I never even noticed them until my husband pointed them out when he explained to me how he built the door.
He also pressured washed the door after it was built. Since it was the middle of winter here in Wisconsin, he took the door to a self-service car wash and pressure washed it there! LOL.
INSTALLATION
Our builder installed a piece of white trim board into the studs of our wall first, and then attached the sliding door hardware onto that for extra stability.
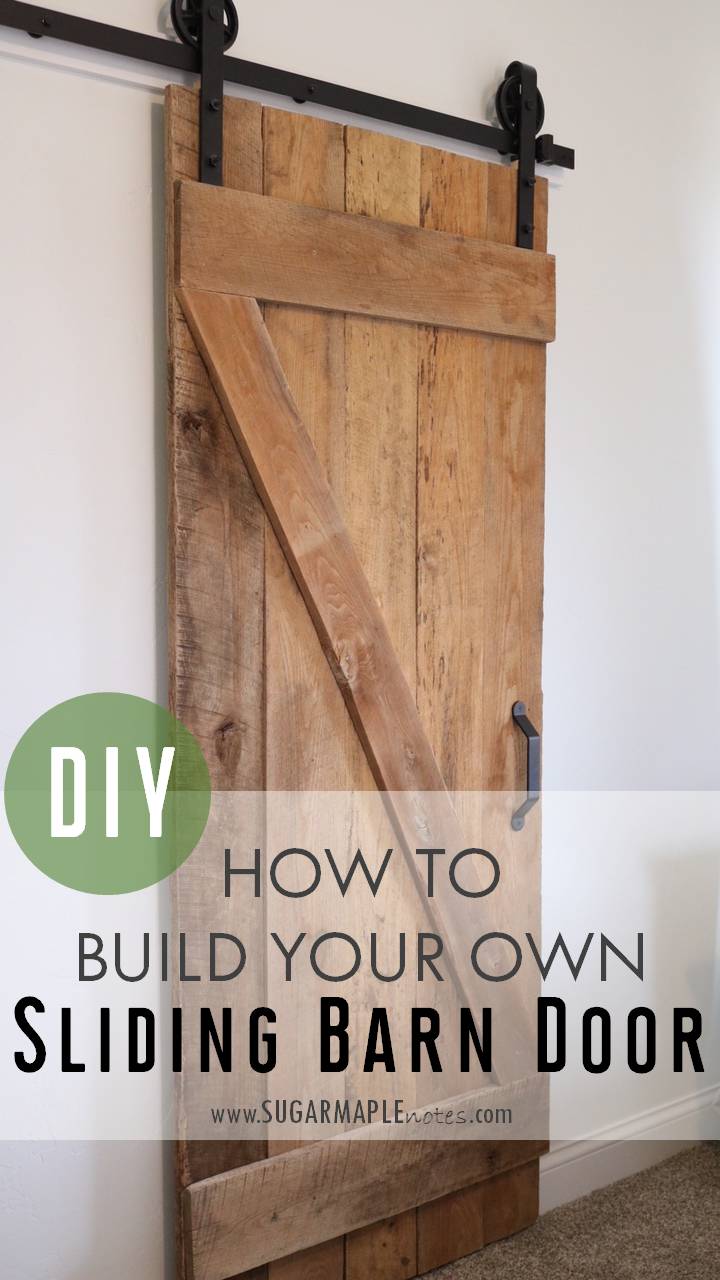
National Hardware sent us a beautiful sliding door hardware kit in oil rubbed bronze with large spoke wheels that add a rustic touch. All the mounting hardware and components to hang one sliding barn door are included. You can purchase the track extension and connecting adapter to accommodate double doors or a larger opening, if need be.
SLIDING DOOR HARDWARE

There you have it! Our beautiful sliding barn door on our master closet.
LIGHTING
I’ll be posting another post that compiles all the lighting we chose throughout the house, but you can see the cute semi-flush lights we used throughout our home in that back hallway in the photo below. I said I would NOT have any “boob” lights in my new house and this ceiling light by CLAXY was the perfect fit for the hallways in our home. I bought them on Amazon for a great price! See it closer here.
We used Hunter fans throughout our home and you can buy our ceiling fan here on Amazon.

MORE HOME POSTS
If you want to see more of our home here are a few other posts you might like!
Pin It!

Good evening, I hope all is well. I am making a barndoor going from our living room to our hallway so sound doesn’t travel as bad. We have crown molding on the bottom of the walls and I was wondering do I need to attach a piece of wood to the wall prior to mounting the bracket? Or if the bracket would keep the door from sliding on the wall?
We have a piece of wood painted the same white as our walls that the bracket is attached to!